Permission Management
In this section
Permission management lets you create Booking accounts with different access levels based on role. To access it, open Users > Administrators, edit an account and select Login account.
Creating a login account
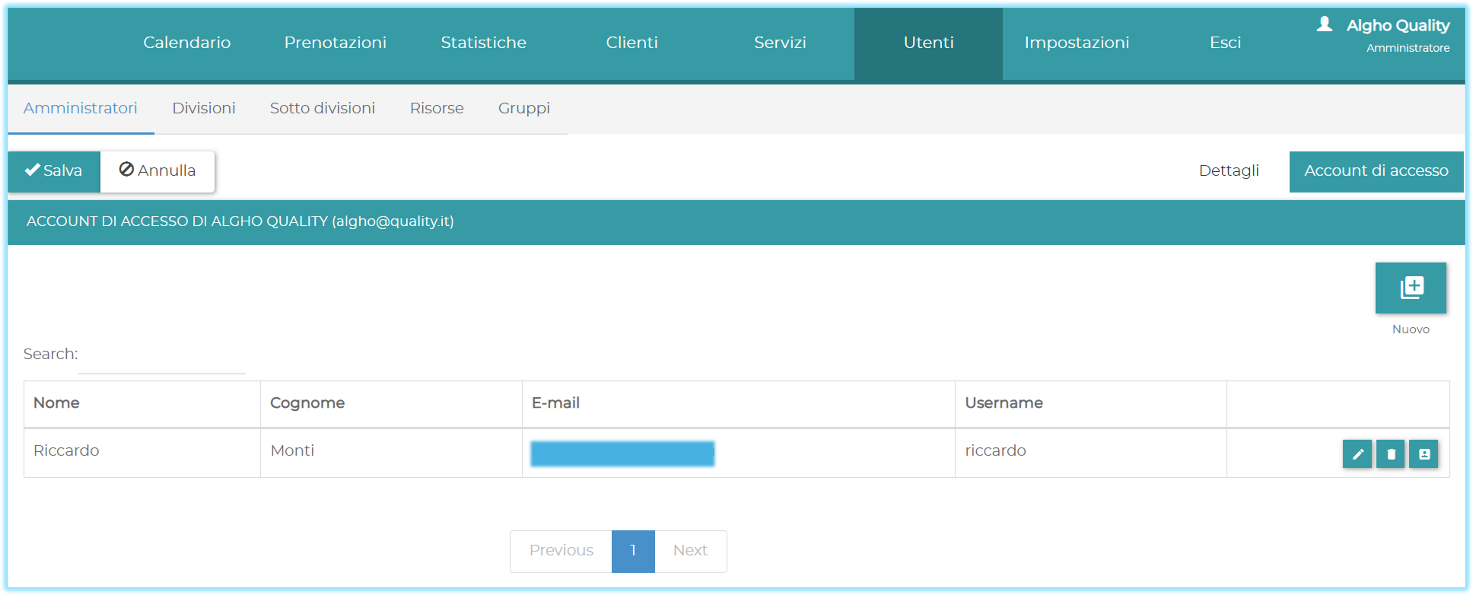
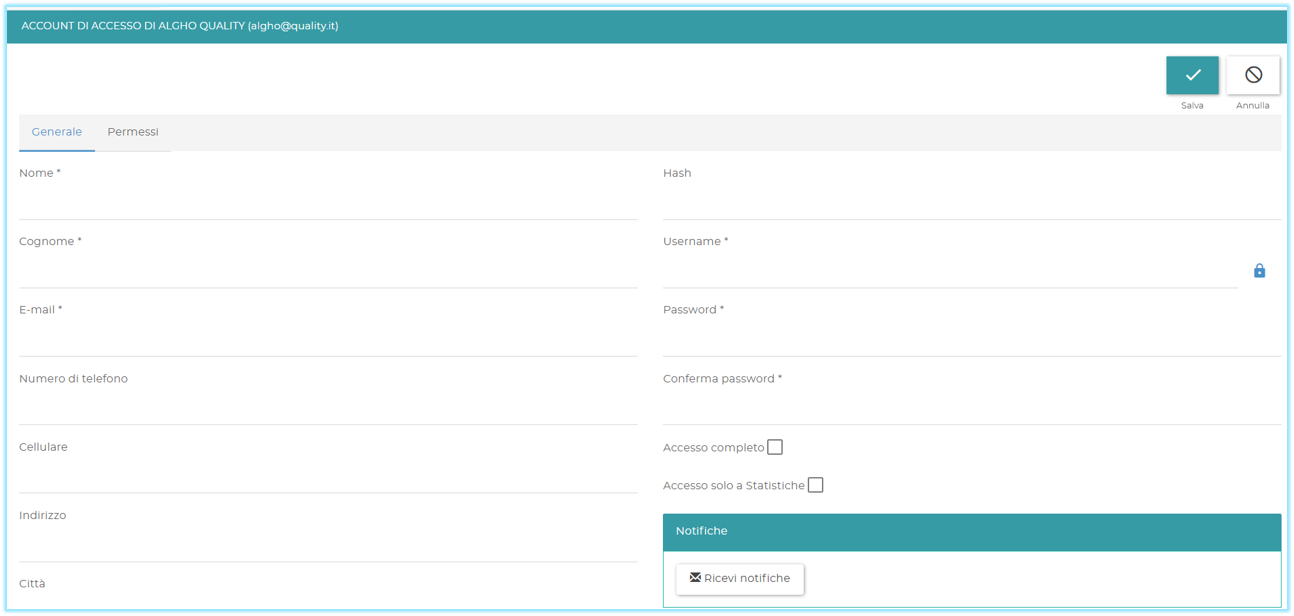
Select New and enter first name, last name, email, username and password.
- Full access: enables all Booking features and items.
- Statistics-only access: enables only the Statistics section.
- Permissions: lets you configure custom access.
Global permissions
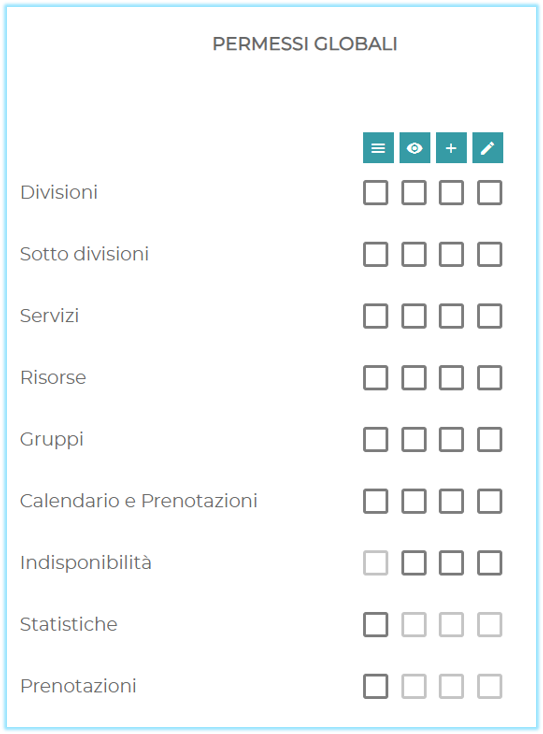
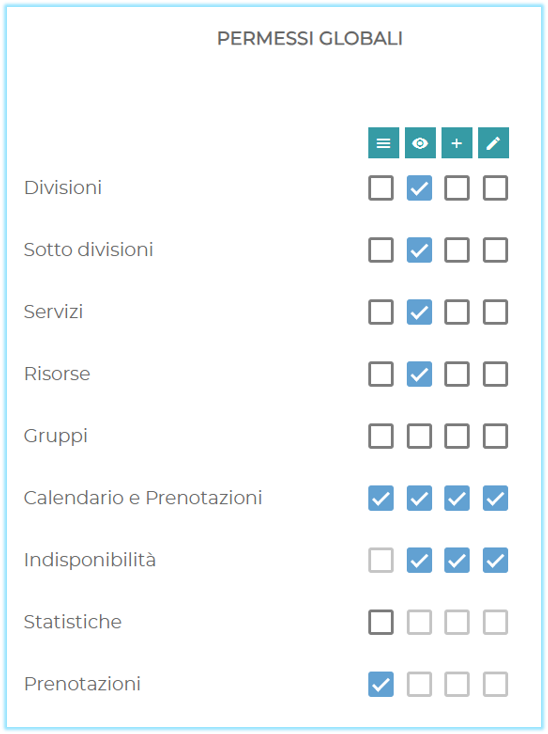
Global permissions define which sections and items the account can use:
- View section: shows the section in the menu.
- View: shows the Booking item.
- Add: allows creating items.
- Edit / Remove: allows modifying and deleting items.
To view bookings in the Calendar, you need permissions on the linked Booking items: Division, Subdivision, Service and Resource. Specific permissions can then restrict access to certain items.
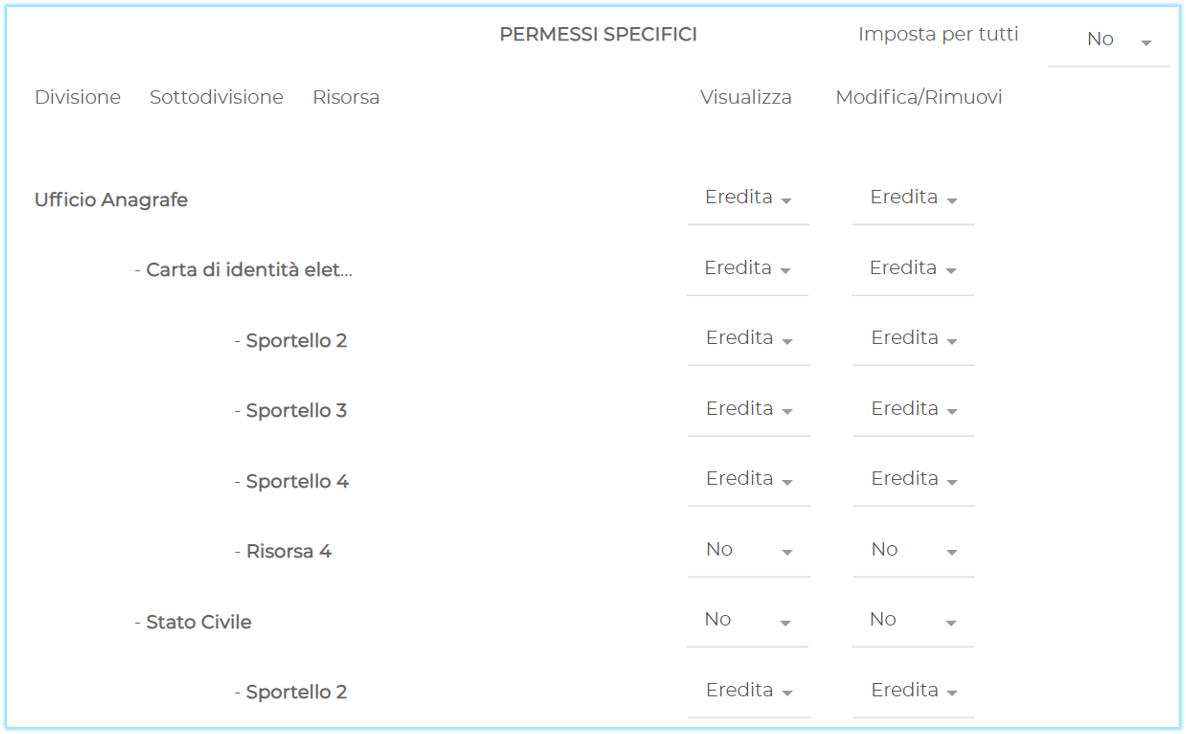
Specific permissions
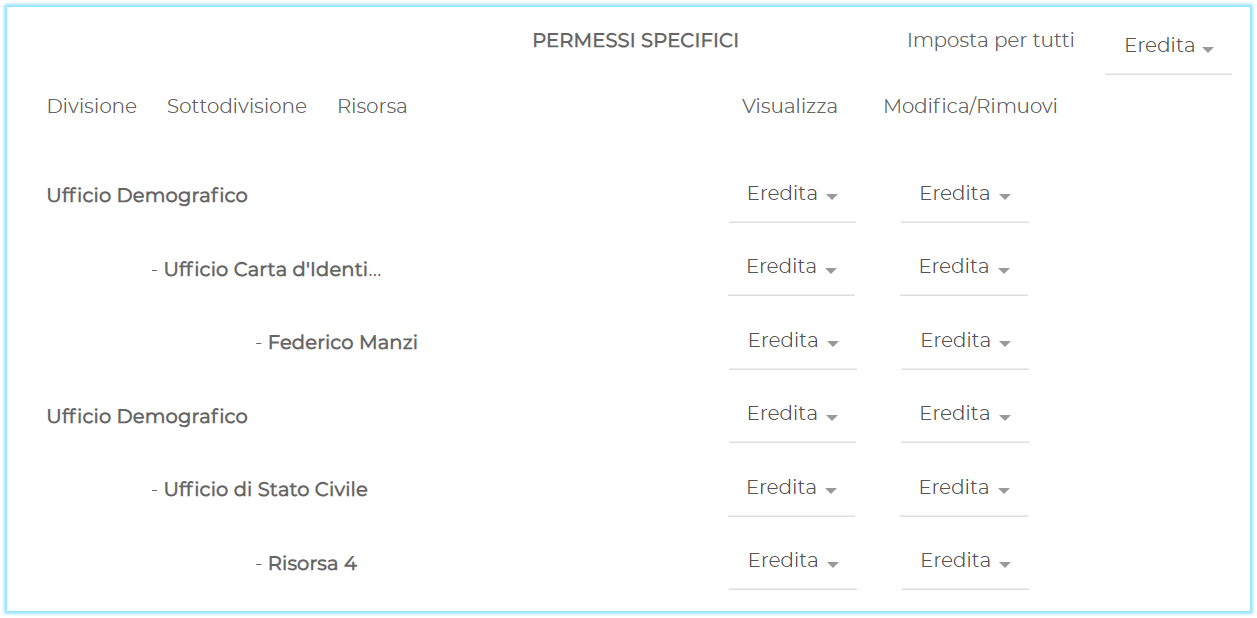
Specific permissions determine which existing items the authorizations apply to. Three values are available for each item:
- Inherit: uses the global permission.
- Yes: enables the permission.
- No: disables the permission.
For example, you can authorize access to the Registry Office Division, the Identity Card Subdivision and the Desk 2, Desk 3 and Desk 4 Resources, excluding Civil Status.
If the same Resource is assigned to different Divisions or Subdivisions, you cannot apply different permissions to it depending on the context. Resource permissions are unique.
Saving and verifying
Select Save in the top right. To check the result, open the account menu and select Log in as user.